3D Printed Xmas Tree Ornaments...of your house!
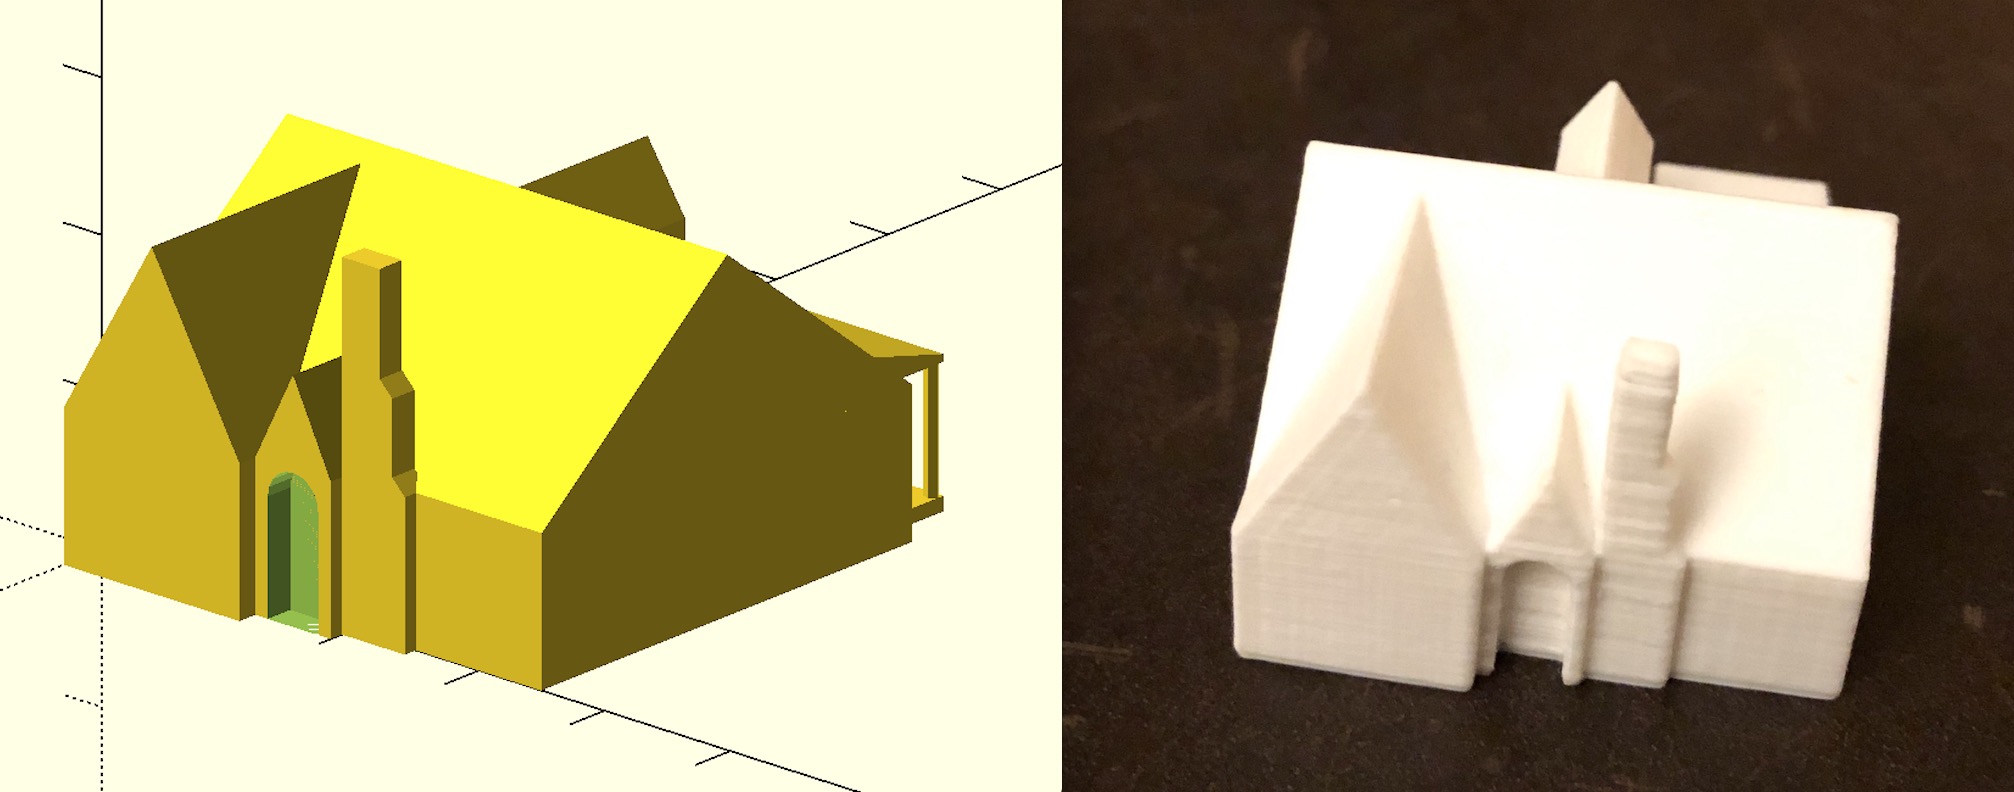
A few weeks ago, I made a model of our house in 3D. We've been discussing a home remodel project and I've been trying to get better at CAD...so it seemed like a useful way to learn a bit more. I fired up my software of choice (OpenSCAD), did a bunch of measuring, and modeled out an accurate scale representation of our humble abode. I made functions for everything: a building with a gable roof, gabled dormers, shed porch, chimney, etc. After I was satisfied with the accuracy, I sat down to show the rendering to my wife so we could discuss the remodel. And, just for fun, I had printed up the result (in PLA at 150 microns). It was 1mm for each foot which made it 304:1 scale.
Her first comment:
"This would be a great Christmas tree ornament! Hey, you should make these for our family this year! Maybe paint them and put snow on the roof too?"
Now, that's a fantastic idea! Never done anything like this before! That week I picked up some modeling paint, some fake snow for the roof, and some tiny hooks.
Modeling
At home, I was able to quickly go outside with a measuring tape and get all the dimensions I'd need. But some of my family lives 2000+ miles away, and I didn't want to give it away by asking questions. However, most property tax records are public and many of them include building dimensions. I was able to look up all my relatives but one. Looked like this:
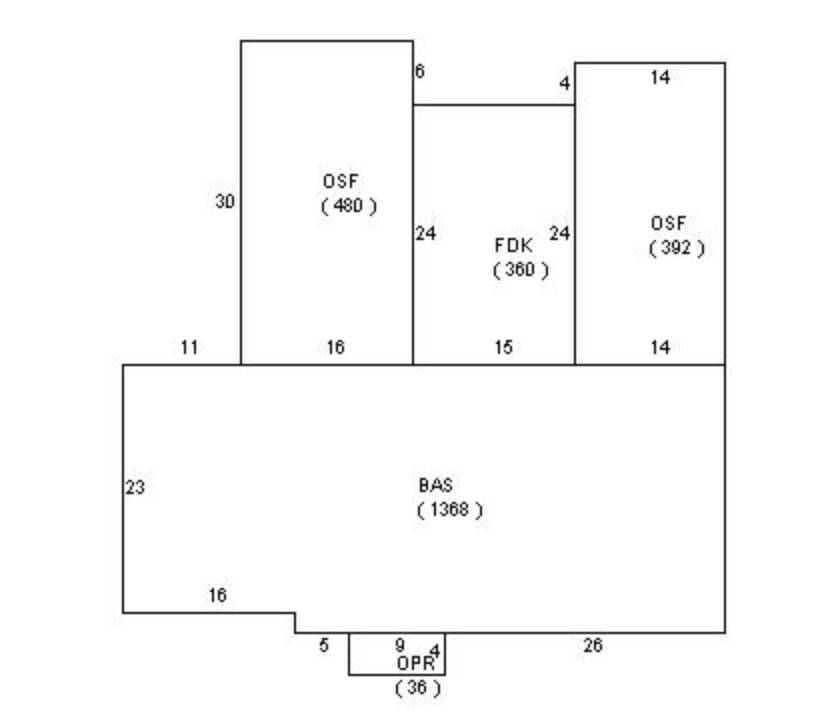
One of my brothers didn't have a sophisticated county website with dimensions, but I was able to find basic dimensions from his deed and used pictures and views from Google maps to approximate the rest.
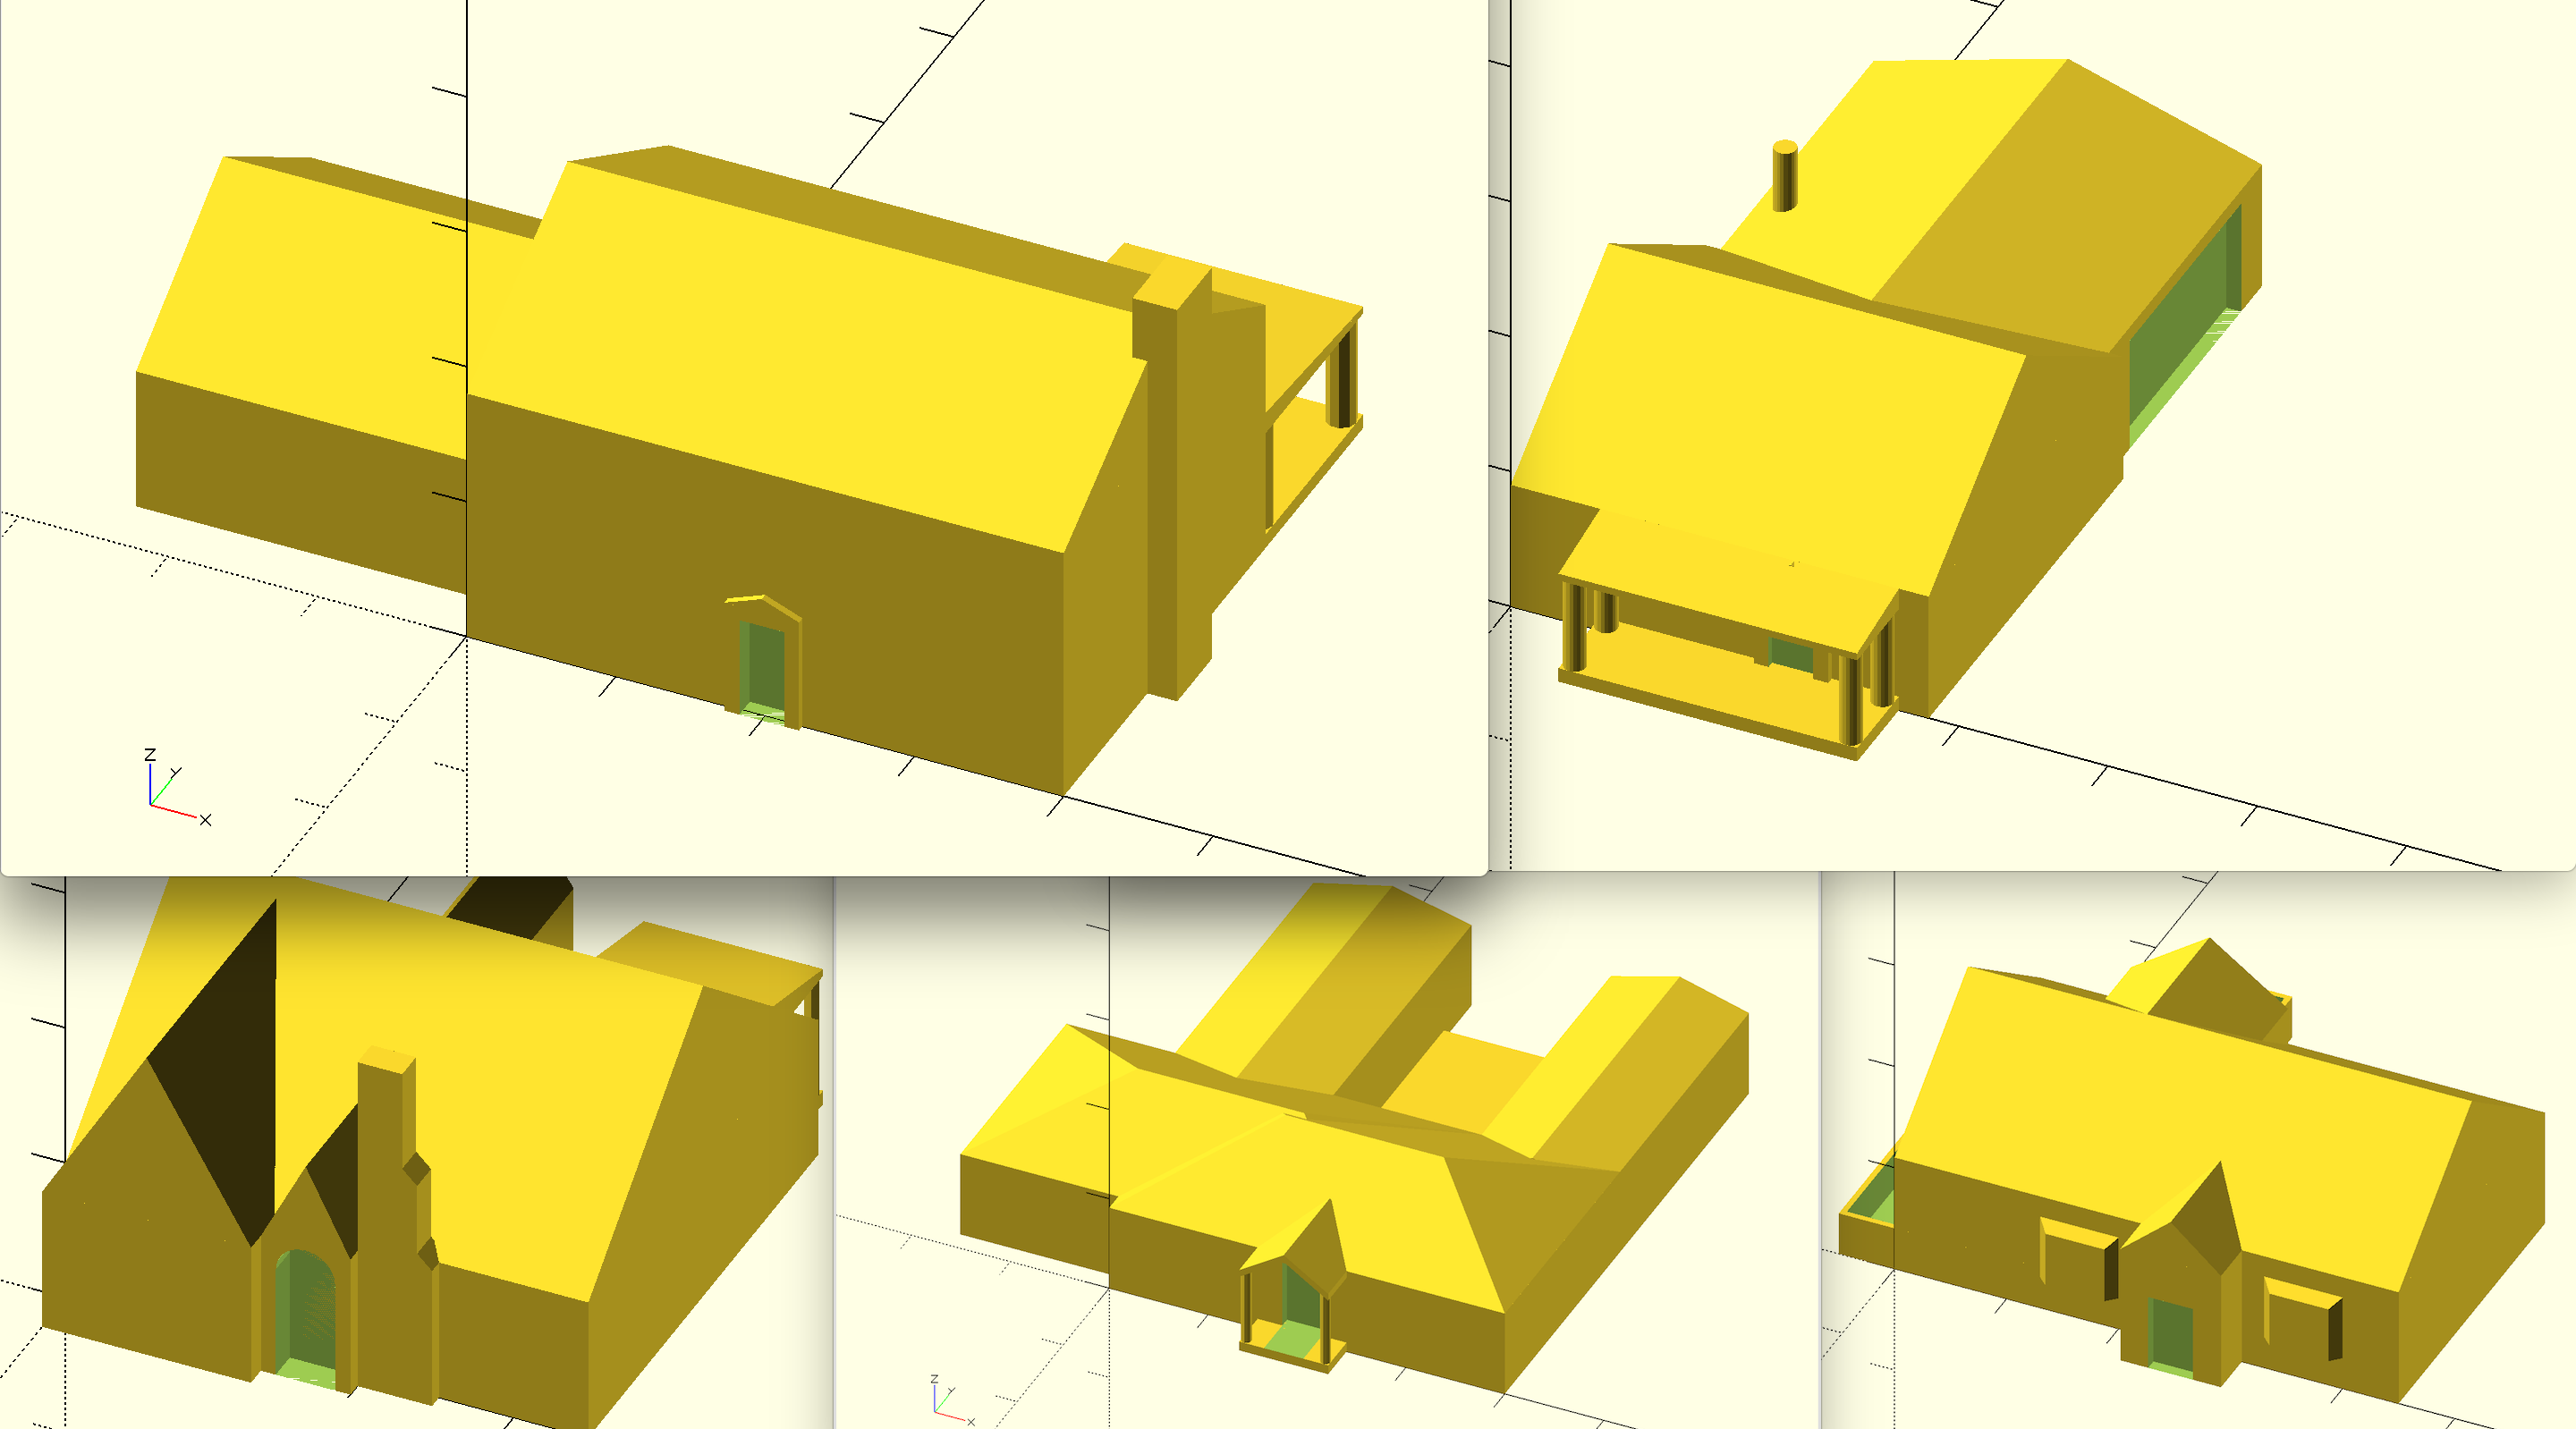
I had to write some more modules for bay windows, decks, porches with decks, porches with columns, etc - and after that was done it only took me about 30-45 min per house to do the modeling. I'd say I spent an hour per night on it, for about a week.
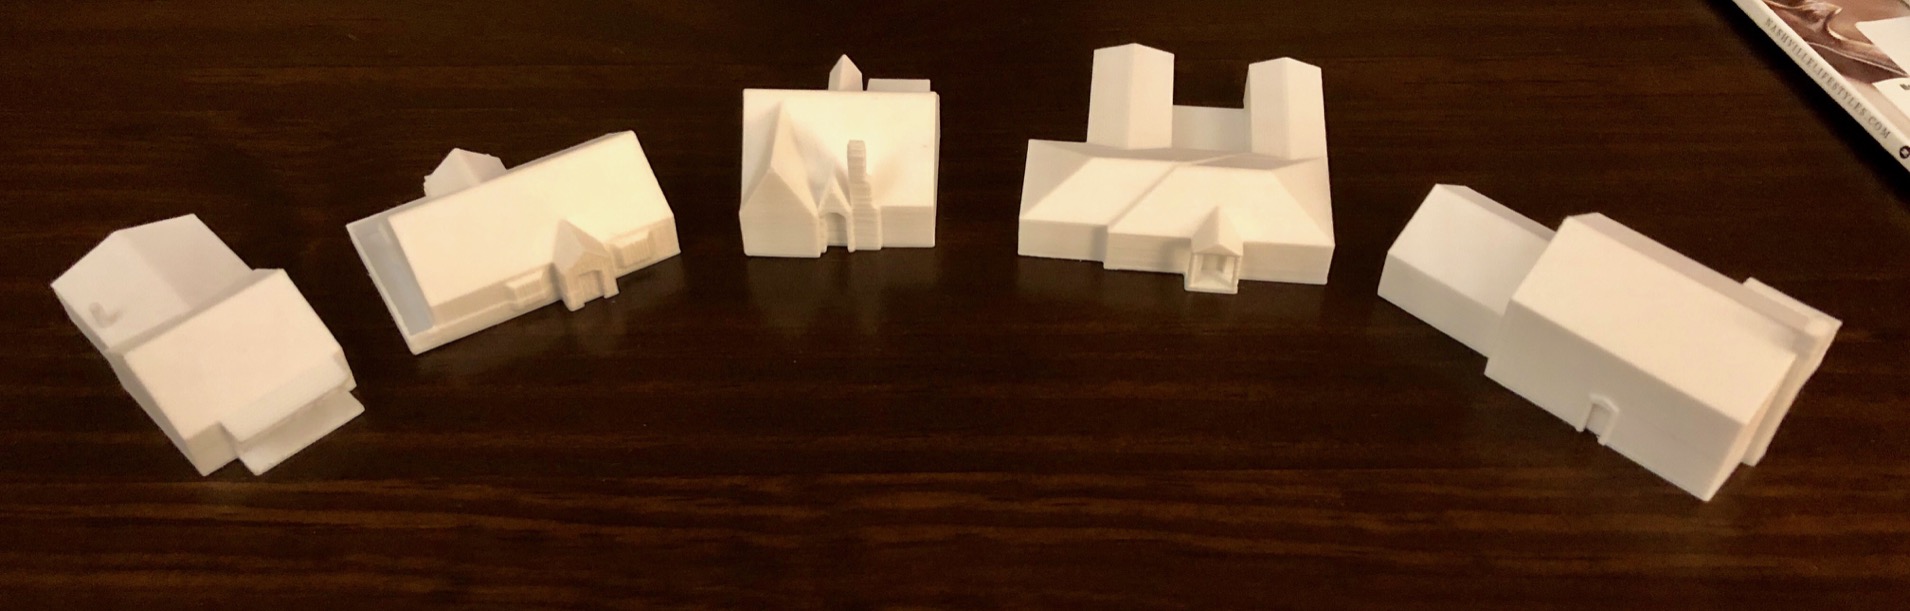
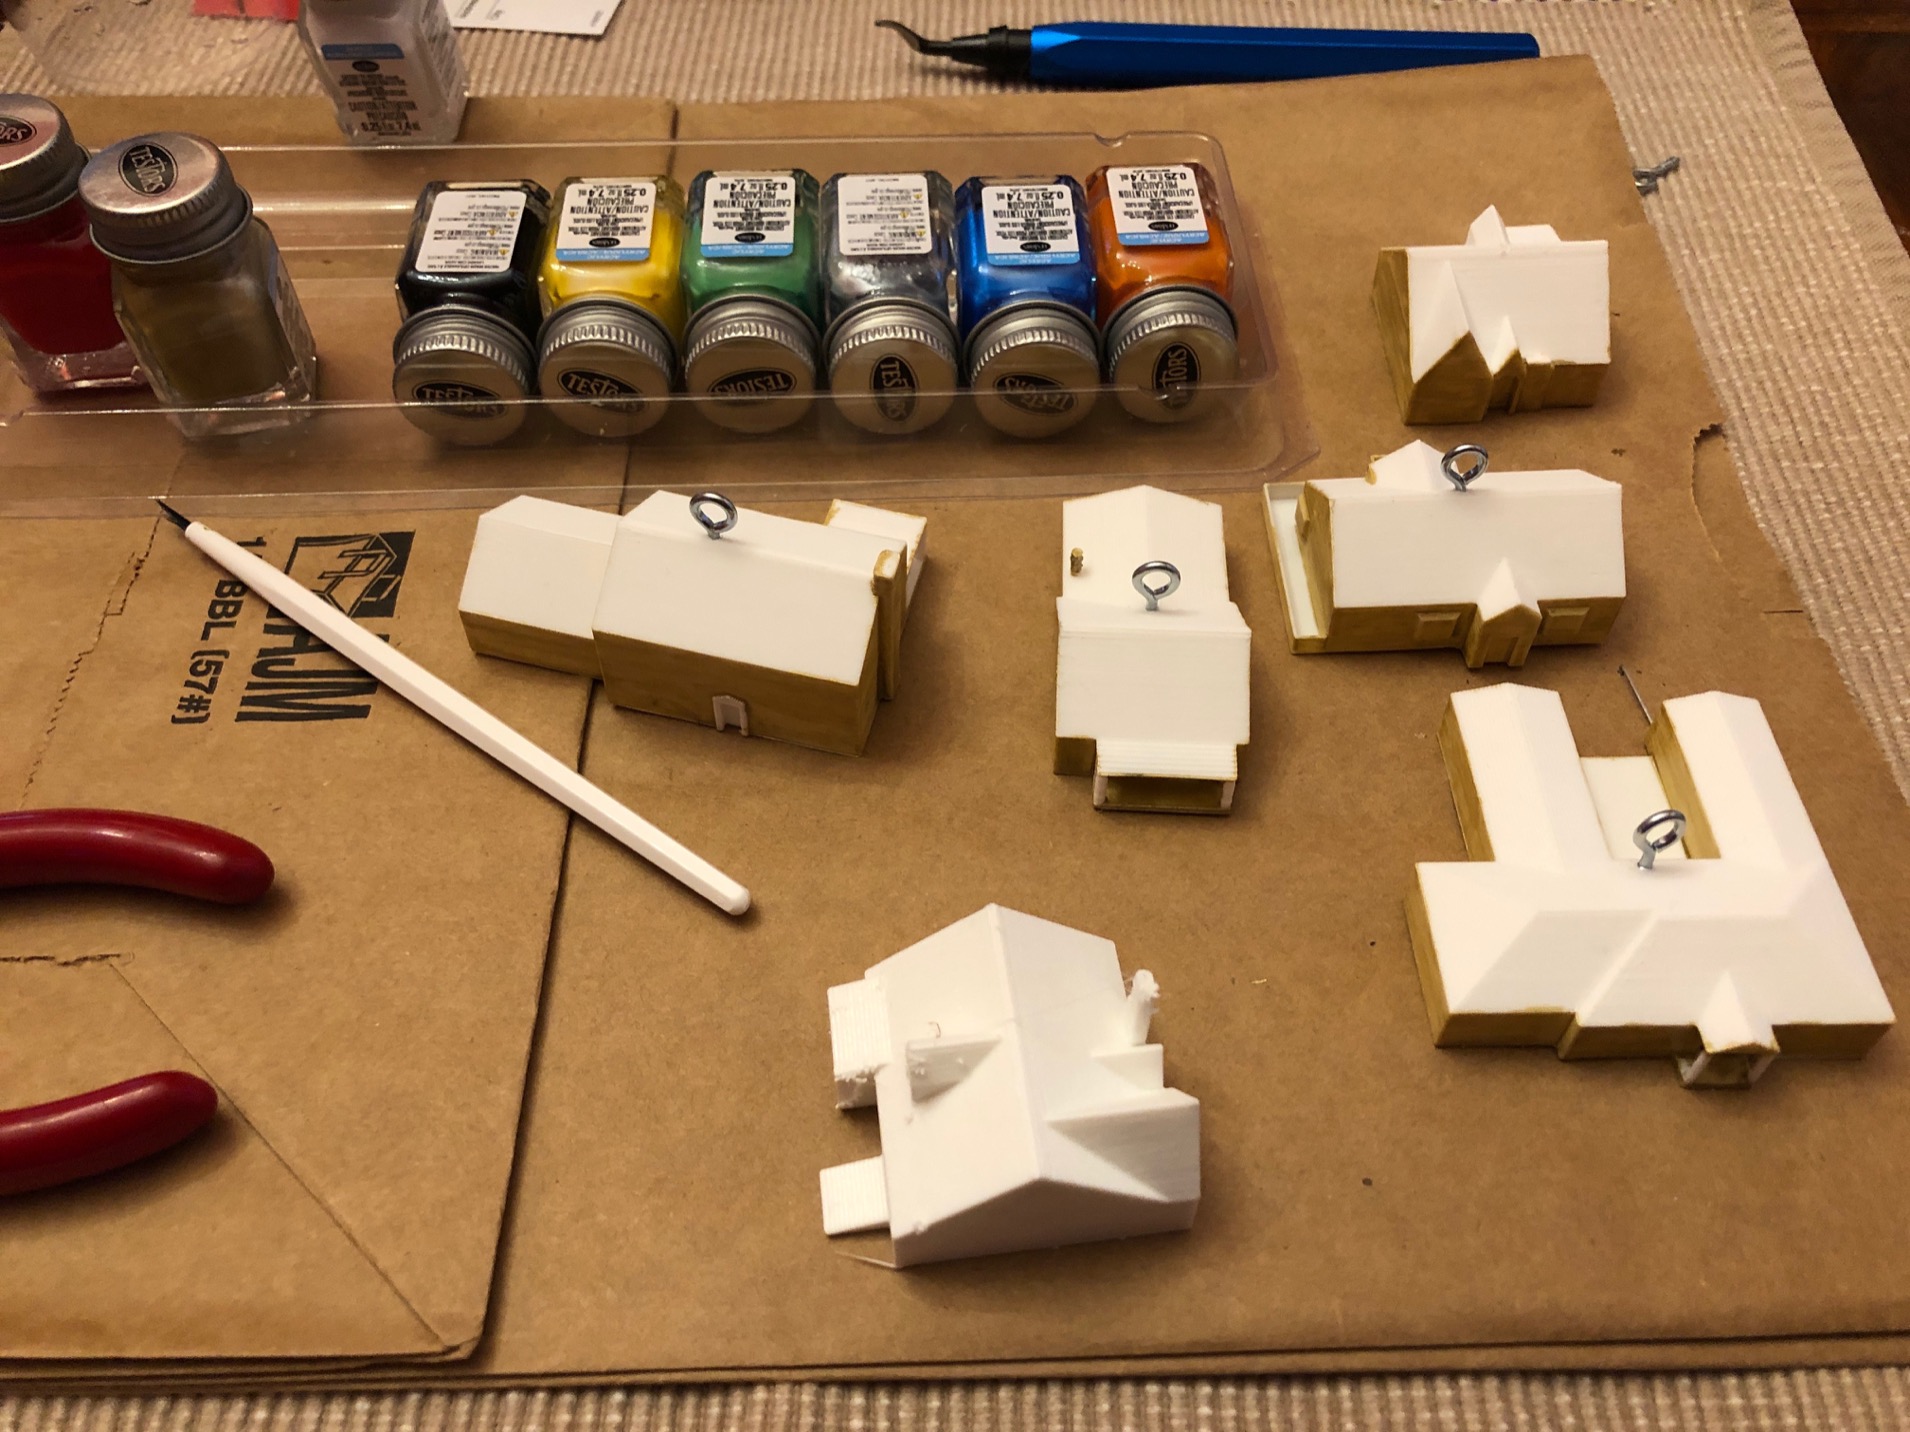
Once I had the CAD done, I got to printing. Printed in PLA at 150 microns on my Prusa MK2S. Some of the models needed tweaking, the columns didn't work, or I got updated info on dimensions..."Hey, did your tree touch the ceiling this year? Nice one, Griswold. So....how tall was that?" etc.
Finishing
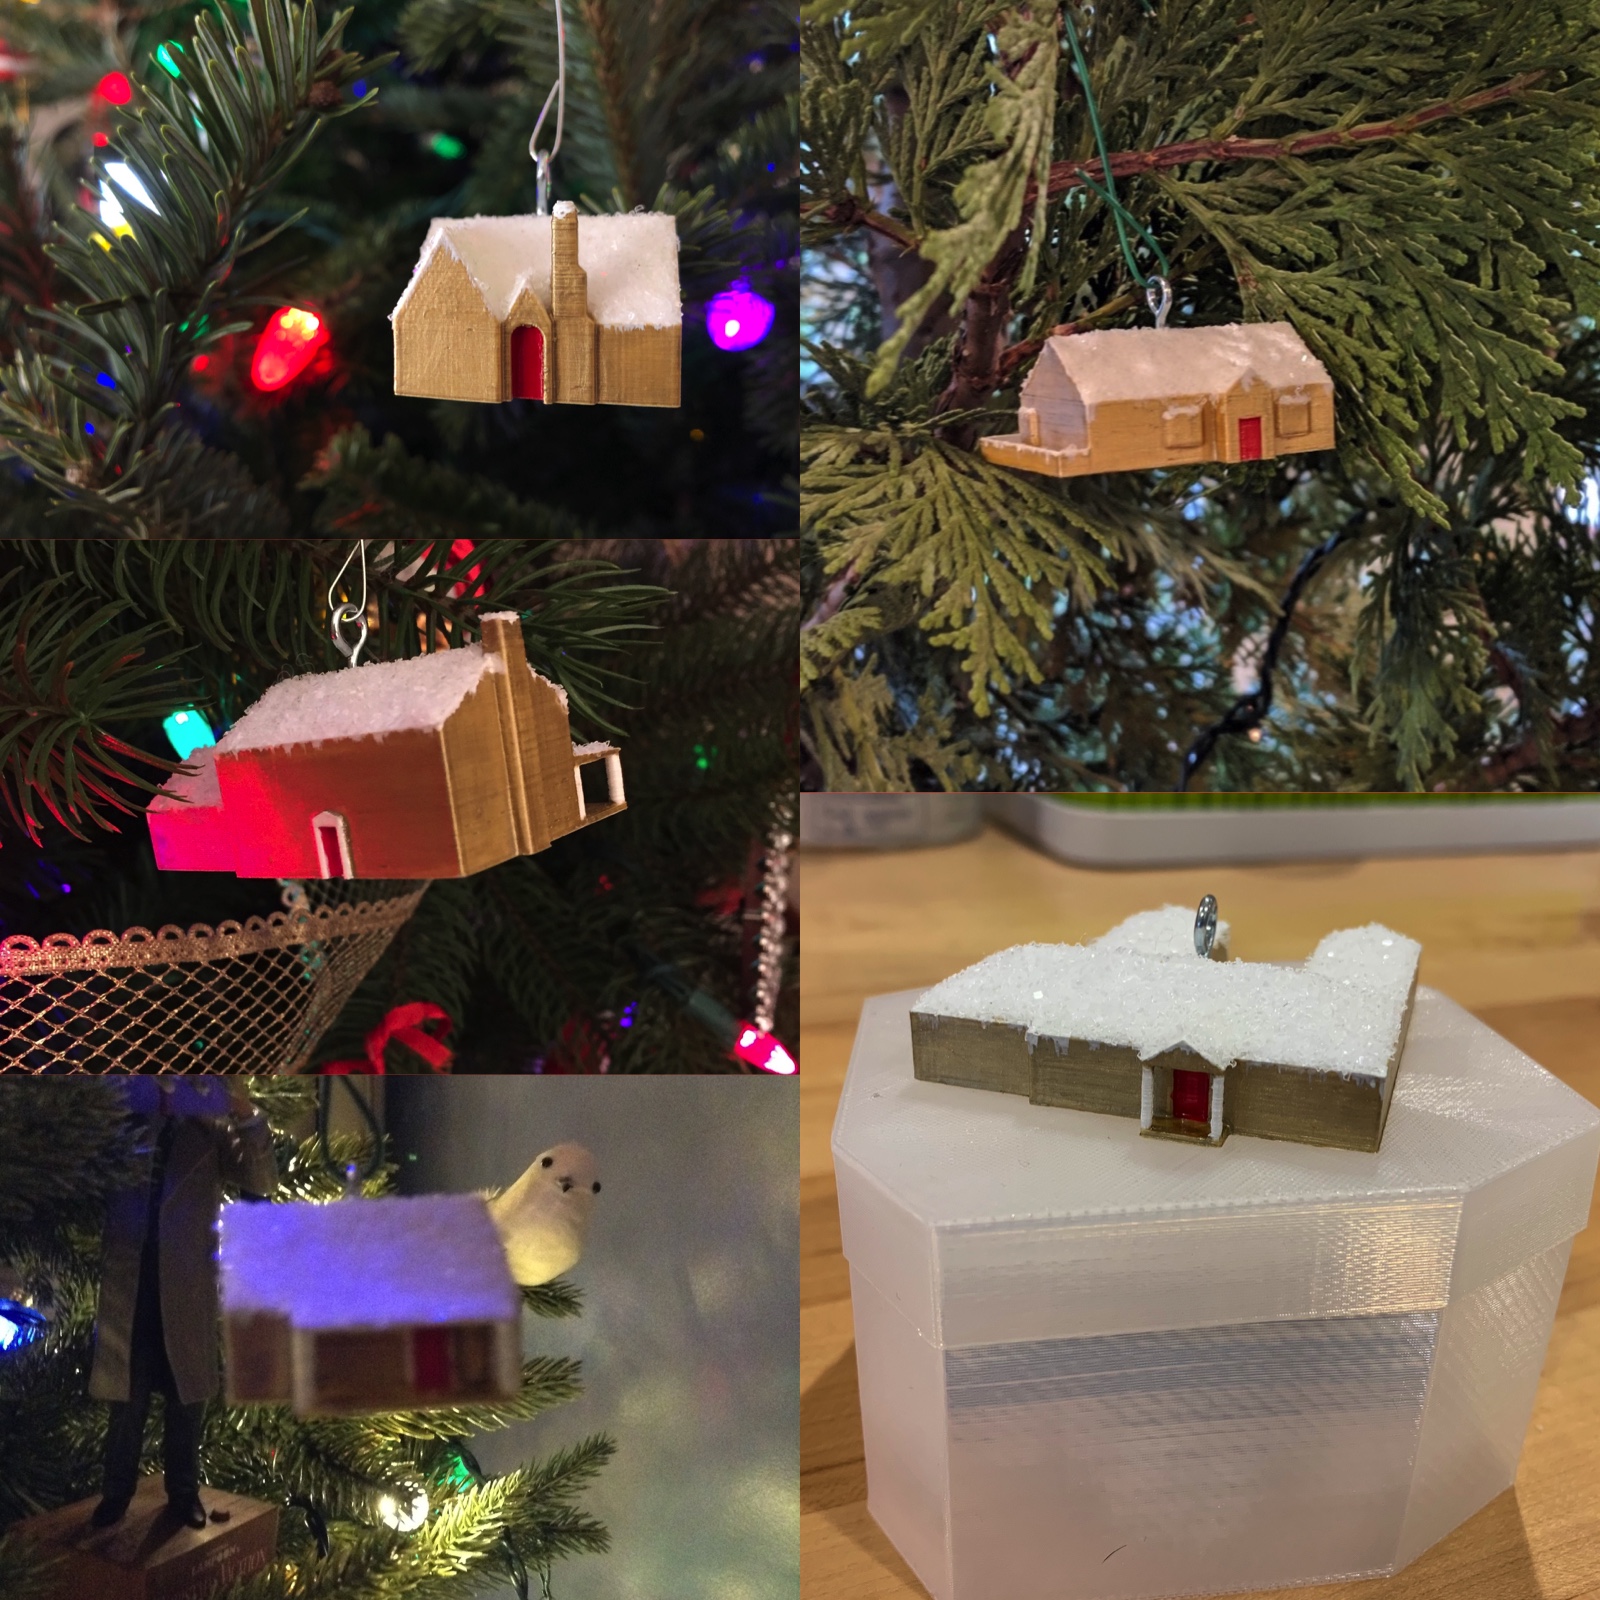
After the models were printed, I sat down one Saturday afternoon, and got to work. The most uncertain part of this project was determining where the center of gravity would be for the hook, so they would hang straight on the tree. Houses are not especially symmetrical, one was even shaped like a U! I used some sharp tools and grabbed the little houses by the edges to get a rough idea and then just kinda winged it. Tested my method out on one of the early non-usable prints I made - drilled a tiny hole with the drill and tested it out - nailed it! I was able to get them all close enough that balance could be adjusted with a little bit of angle on the screw-in hook.
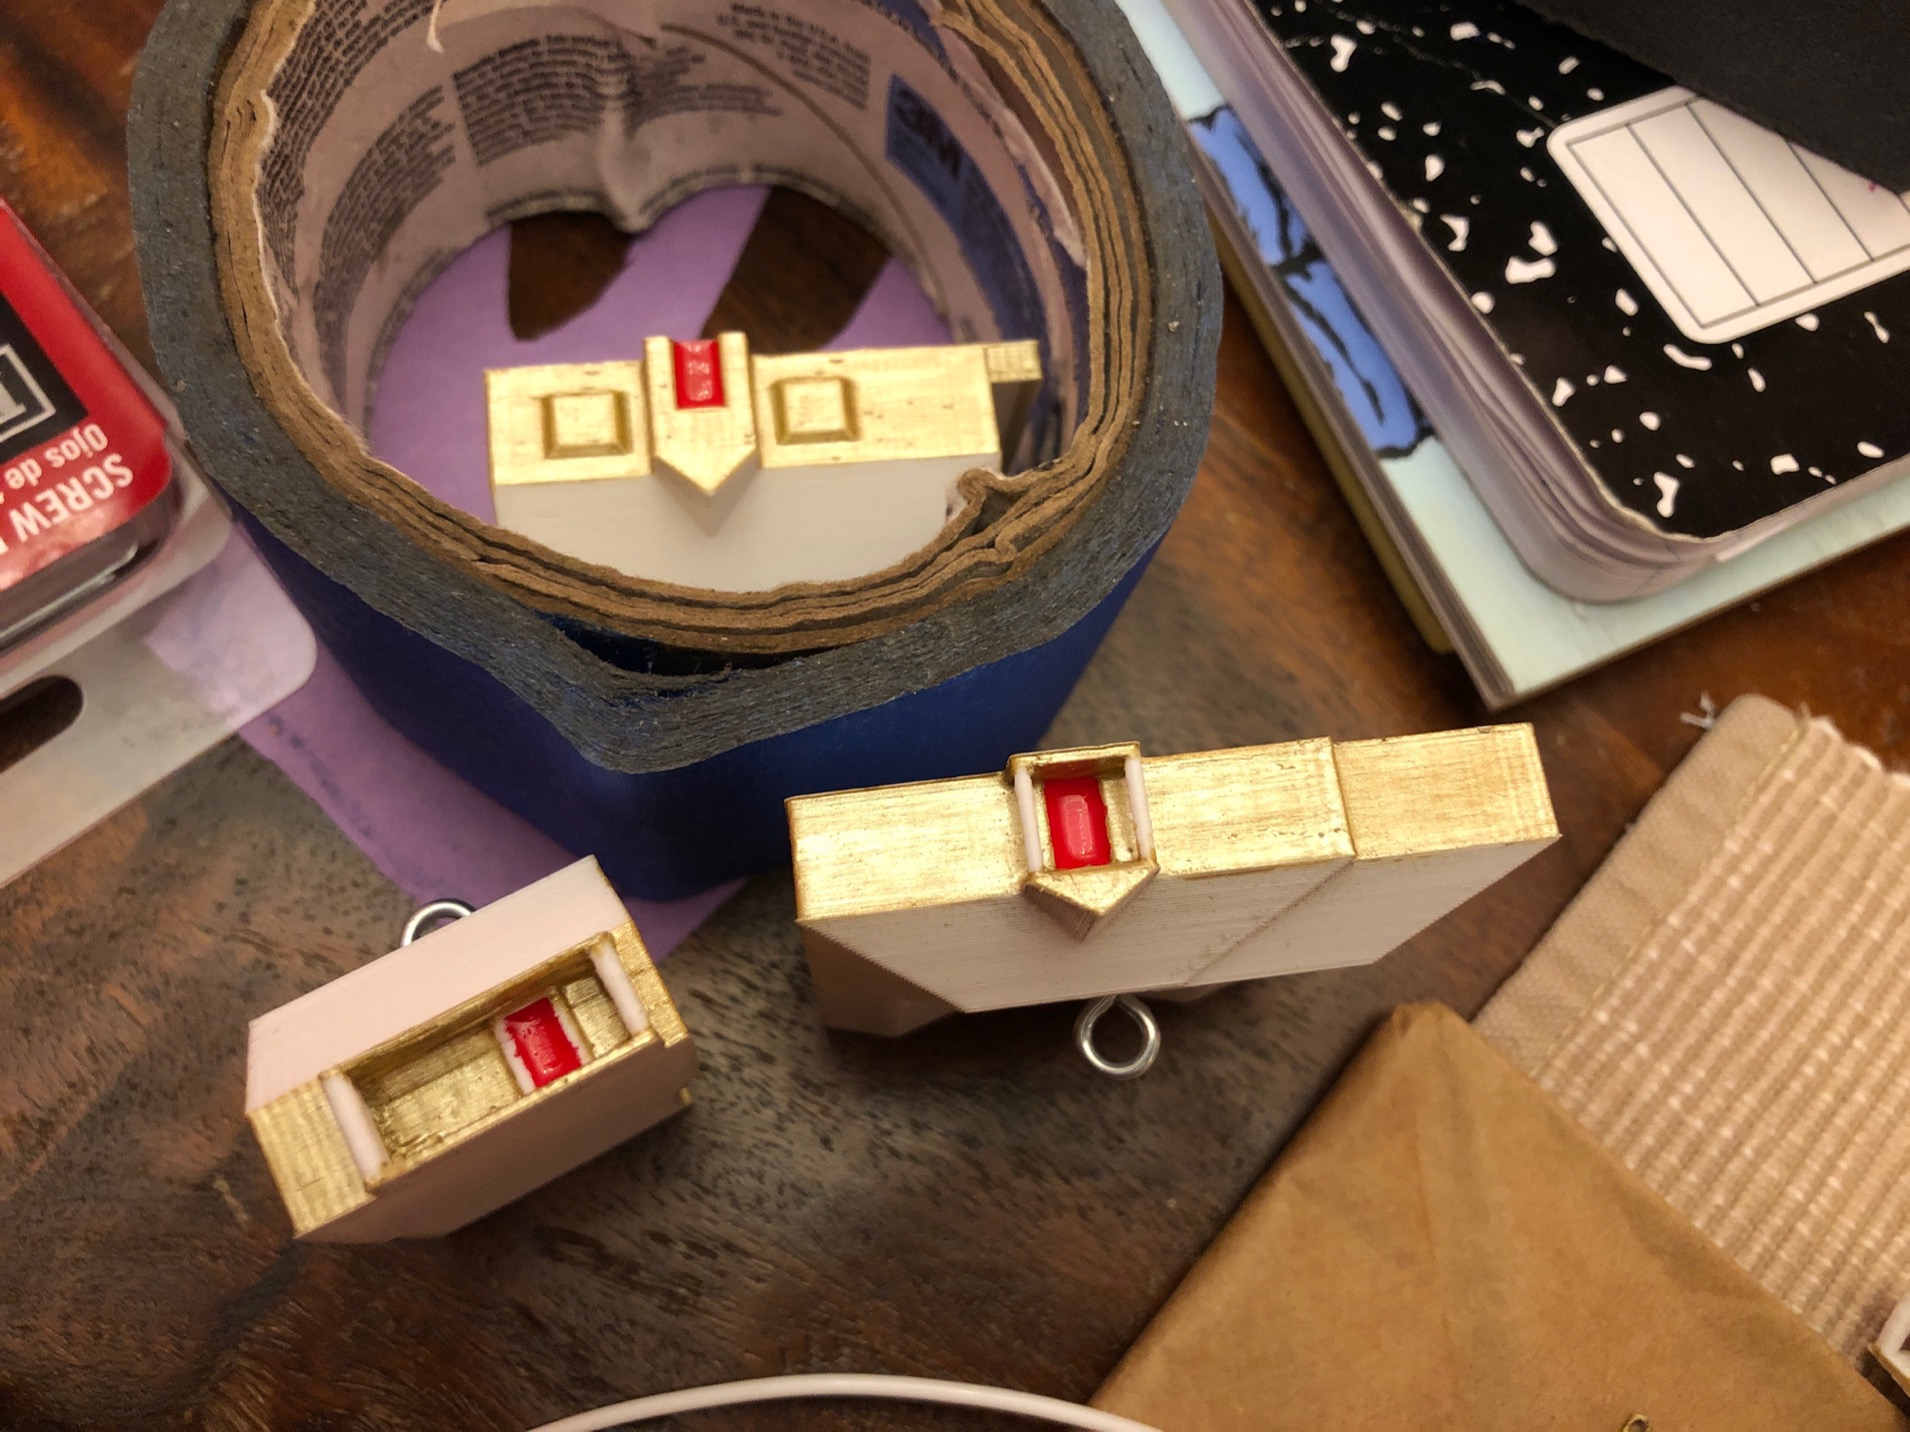
Painting is't something I'm good at or have done much of, but gotta start somewhere. Unscrewed the hooks and got out the paints. I chose gold, with white accents and a red front door. It seemed Christmas-y to me. 2 coats of paint were needed, the print layers seemed to absorb the paint. It was painstaking work and I felt like I was going to go blind, but they looked pretty great in the end. Painting the red front door was hard and took forever, but worth it! As I finished up, I made a mistake with white paint near a roofline...but realized it looked like an icicle. So, I added little icicles to them all, super cute looking.
The snow I had ordered was made from crushed glass - and I tested it out on a test house - I coated the roof of the house with glue and poured it on. Wow! It was really beautiful and sparkly...but the bits were too big. Didn't look like snow. So, I just used some white glitter instead and it looked much more realistic.
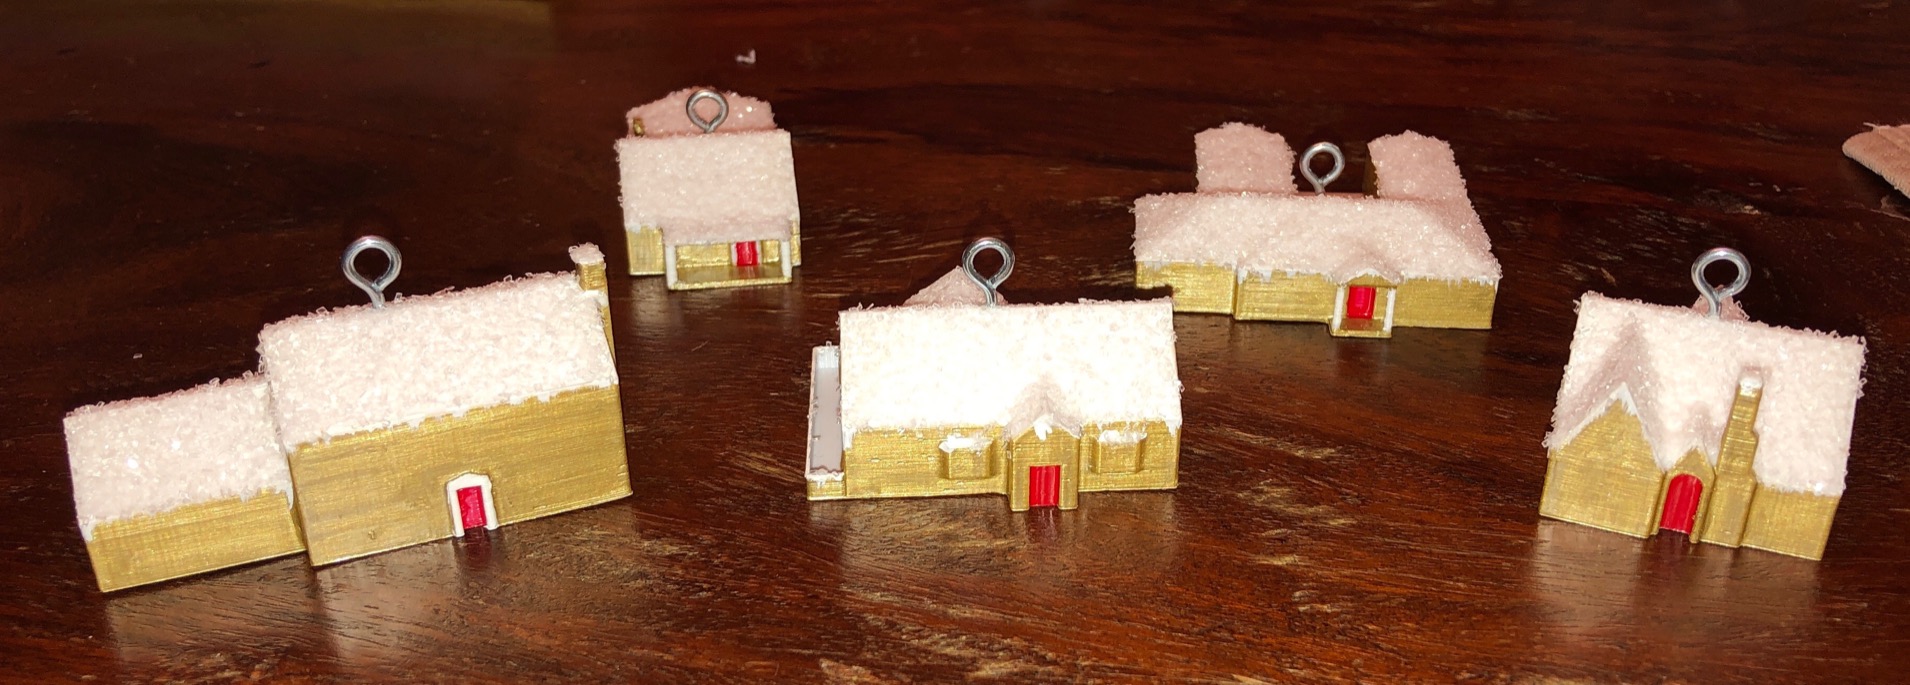
Boy they look good! The gold paint is shiny!
Packaging
I was struggling to figure out what to put these neat little ornaments in...cardboard boxes were all way too big and weren't nice enough - so at the last minute I decided to design and print a clear box, so they'd have something to store them in each year. And made it oddly shaped while I was at it, because why not!

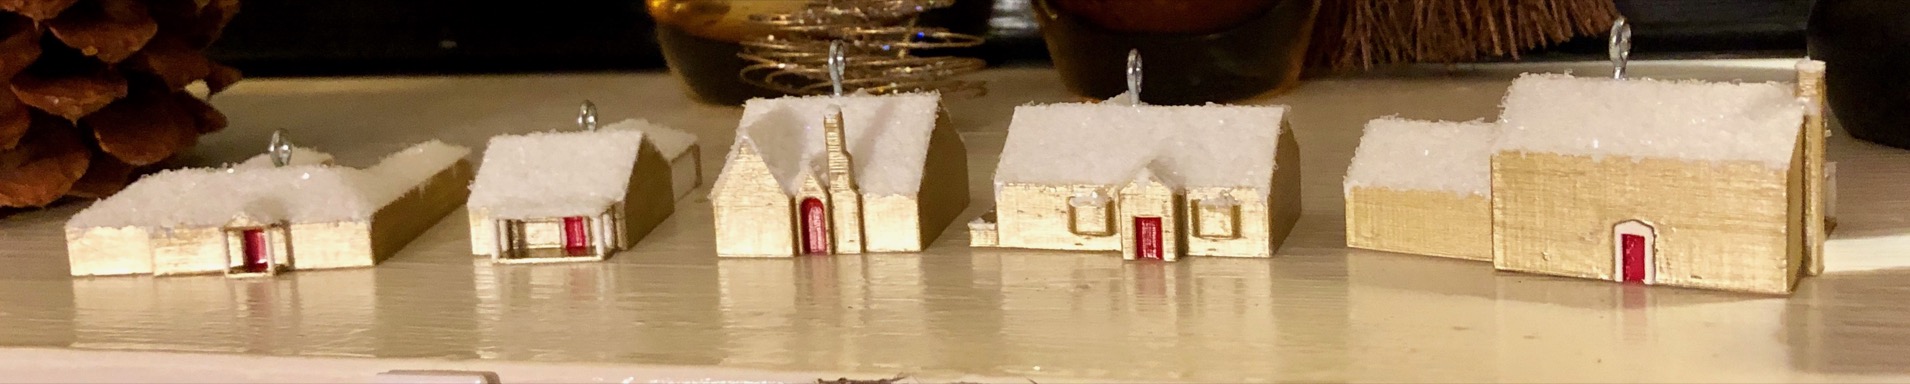
I mailed 2 of them off and gave the rest out at family xmas a few days later. They were a hit! Check out the pics of them on the tree!
Merry Christmas!